
The previous gateway models are the MGW211-DP24 and MGW211-DP28. This article is based on testing the AGW332-EU868 with firmware 1.0.0. We conducted these tests in August / September 2026.
The GoBright Advanced Gateway is basically a solid piece of kit that hooks your devices upto the cloud. It makes sure all the data syncs perfectly and keeps your smart workplace online without any hiccups.
Planning Your Installation ▼
When figuring out where to put your gateway, keep an eye out for things that can block the signal—like thick concrete walls, metal objects, elevators, and stairs. If you hit any dead zones, you might need to reposition the gateway or add an extra device to make sure the whole building gets solid coverage.
Important: You must be an administrator on the GoBright portal to ensure you can complete the following steps. The GoBright mobile app is required (Android or iOS) and it needs to be running the latest version.
Checklist ▼
✓
A smartphone with the GoBright app installed. This is available for free from both the Apple App Store and the Google Play Store.
✓
Full admin access rights for your GoBright account that is logged in on on the app.
✓
Bluetooth enabled on the smartphone.
Hardware Overview & Tech Specs ▼
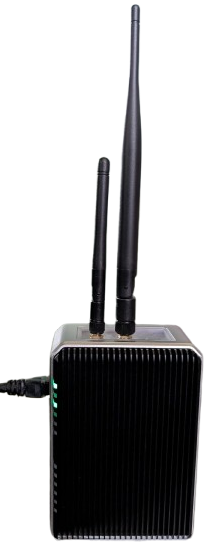
The Small Antenna
This is used for Wi-Fi communication and both 2.4 GHz and 5GHz are now supported.
The Large Antenna
This is used for any communication if LoRa sensors are being deployed. So far we have tested the Elsys LoRa Desk Sensor (EMS2) and the Elsys LoRa Room Sensor (ERS2).
Hardware Information & Tech Specs
Model Tested: AGW332-EU868
RF / Sensor Frequency: 868 MHz (EU868) dedicated LoRa band for long-range, encrypted sensor telemetry
Wireless: Dual-band Wi-Fi: 2.4 GHz & 5.0 GHz
Wired: RJ45 (ETH0, ETH1)
Bluetooth: Built-in (for use in the commissioning process)
Power Options: PoE+ (at 30W) which must be powered via the ETH0 port. Mains powered option available
LED Indicators: Multiple LEDs to confirm the state of the device
Security: End-to-end cloud encryption as standard, including hardware level packet filtering
Prepare your GoBright Environment ▼
Before you begin commissioning the AGW, there's a few steps that you'll need to carry out in the GoBright portal. We'll guide you through them in this section.
1) Login to your GoBright portal with administrator rights using this link.
2) Navigate to Settings > Devices > Profiles and select Add
3) Change the the Type to Advanced Gateway, give it an appropriate name and save the settings
4) On the same page, select Commissioning Presets and add a new preset. Give the preset a name
(this will be shown in the next steps when we commission the AGW). Change the Type to Advanced Gateway and select the previous profile you've just set up
5) Complete the required Connection and NTP settings. During our testing we enabled automatic NTP (via DHCP)
6) Save the changes and you will see the new commissioning preset
Now we can move on to the next step to commission the AGW.
Commissioning The AGW ▼
As mentioned in the tech specs, the AGW is powered by PoE+ at 30W and must be powered via the ETH0 port. Do not use ETH1.
A 230V power supply is not included as standard and must be purchased seperately. Please speak to your Ascentae Account Manager when ordering the AGW to make it clear that you require a mains power supply if you're not powering the device over PoE.
Let's Get Started...
1) Make sure that the toggle switch on the top of the gateway is toggled off of 'boot' (toggle switch flicked towards the Ethernet ports).
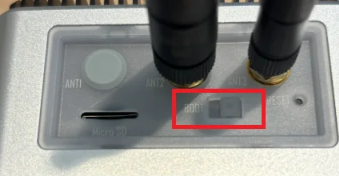
2) Plug the PoE cable into ETH0 on the AGW. At this stage, please be patient as it can take around 10 minutes to complete the boot cycle. During this stage the LEDs will flash different colours and patterns until it settles down.
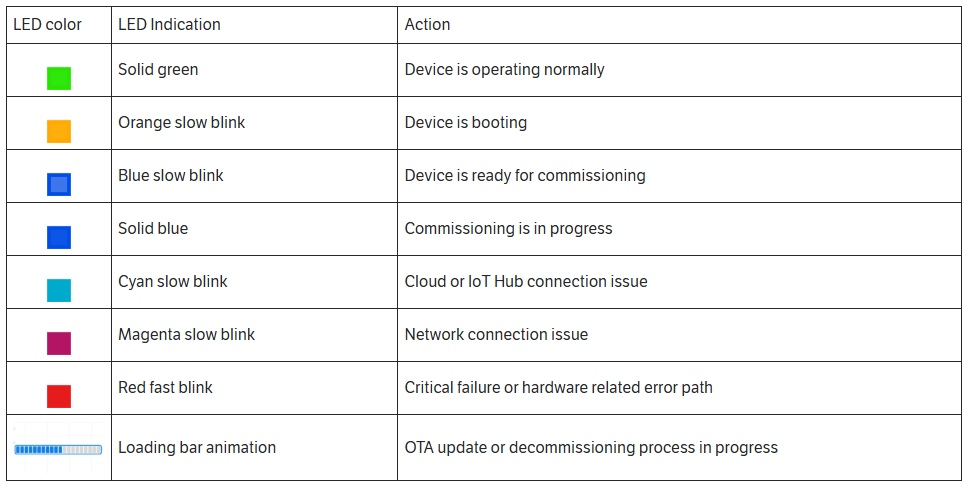
3) Now the device has booted, it's ready to commission - it will show a blue slow blink. This means it's in 'discovery mode'.
Discovery mode only remains active for up to 10 minutes and will require a reboot of the AGW if left longer.
4) At this stage we now need to fire up the GoBright app. Select the 3 horitzontal lines in the top-right and then Admin Tools and Commission a Gateway by QR Code.
5) Select the pre-configured commissioning preset
6) The next step is to scan the QR code on the rear of the AGW. Complete all the required fields and move on to the next step. Shortly you will see the following screen confirming connectivity:
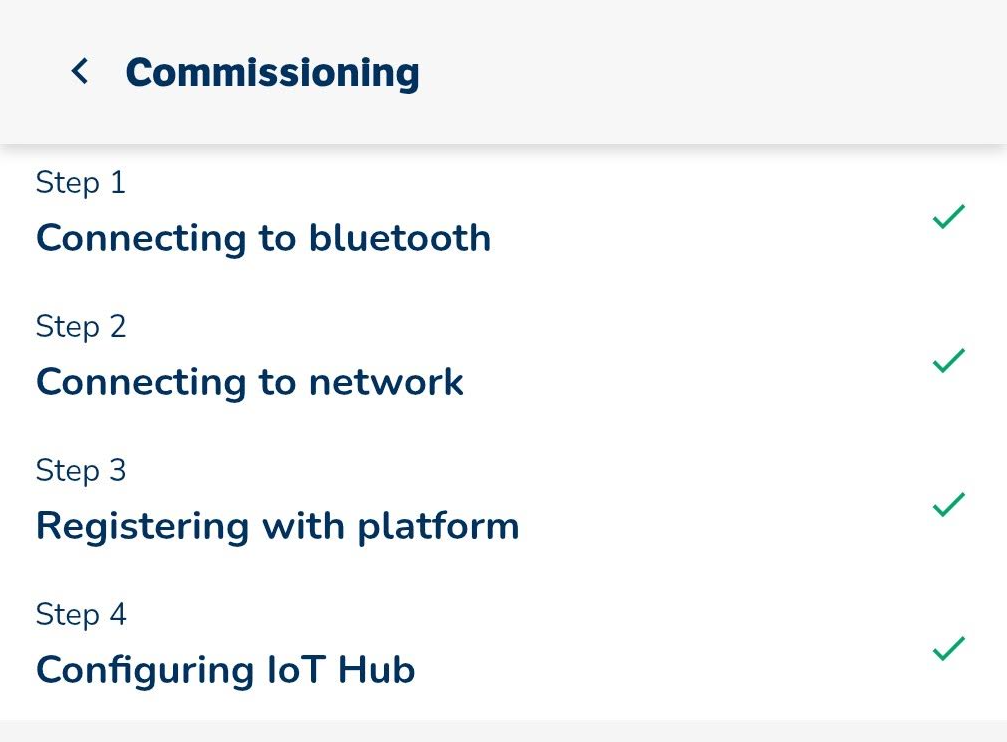
7) After around 30 seconds the AGW will update to show two solid green LEDs. See the next section for a breakdown of the different LED colours.
LED Indicators ▼
The AGW gives a clear indication of the status of the device.
Portal Information & Summary ▼
Now you have an active Advanced Gateway set up in your portal. Just head to Settings > Devices > Gateways.
Here you can remotely:
- See and update the firmare the device is running
- Find the serial number of the device
- Connection status
- Local IP address allocated to the AGW
Technical Support ▼
We're here to help. Log a support ticket by contacting support@ascentae.com with as much information as possible and a member of the team will get back in touch.